Postpartum Freezer Meal Containers: What to Look For and How to Choose
Last updated: August 12, 2026
Quick Answer: For postpartum freezer meal containers: what look how choose, start with 3 container types—1 to 2 cups for single portions, 4 to 6 cups for soups and sides, and 8×8 or 9×13 pans for casseroles. That covers most postpartum meals without overbuying.
Stocking up for the postpartum weeks? Then the container matters almost as much as the meal. The wrong one leaks, warps, stains, or hogs freezer space; the right one makes reheating simpler when you’re tired, sore, and holding a baby. When it comes to postpartum freezer meal containers: what look how choose, I’d start with storage shape, freezer safety, and how easily you can reheat straight from the container.
Key takeaways
– 3 sizes cover most needs: 1 to 2 cups, 4 to 6 cups, and 8×8 or 9×13.
– Freezer-safe and leak-resistant matter most for soups, sauces, and batch meals.
– Rectangles usually save space better than round tubs in fridge freezers.
– Use oven-safe glass or foil for baked dishes you’ll reheat in the oven.
– Label every meal with date and contents to avoid mystery food.
What Actually Matters in a Postpartum Freezer Meal Container
Feed me fast, without the dish pile. That’s the real brief. So choose containers for fit, freezer performance, and reheating method first. When you’re organizing a deep freezer full of soup, breakfast burritos, casseroles, and chopped fruit, the answer shifts by food type. One style rarely does all of it well.
Here’s the short version: I’d start with stackable, freezer-safe, leak-resistant containers that fit your shelves and your usual portions. Planning to reheat in the microwave? Then choose microwave-safe lids or a container you can open partway without warping. Planning to use the oven? Go with something oven-safe, or use a disposable foil pan for baked dishes.
| Situation | Best Path | Why Other Options Fail |
|---|---|---|
| Soups, stews, chili | Freezer-safe deli containers or straight-sided silicone containers | Glass can break if filled too high; flimsy takeout tubs often crack or leak |
| Casseroles, baked pasta | Foil pans or oven-safe glass/ceramic containers | Round tubs waste space and make portioning awkward |
| Single portions | 1- to 2-cup freezer containers | Large containers force thawing more than you need |
| Family-size batch meals | 8×8 or 9×13 freezer-ready pans | Small containers create extra packaging and more washing |
| Breast milk storage | Bags or specialized milk storage containers | Food containers are usually bulky and not ideal for this job |
What matters most? What am I storing? How will I reheat it? Where will it live in my freezer? Those three questions decide almost everything.
Quick check: Crowded freezer? Mixed meals? Then stackable rectangular containers beat one “perfect” box.
Postpartum Freezer Meal Containers: The Materials I Would Choose First

Plastic, glass, silicone, foil — each one solves a different problem. Choose based on how fragile your routine is likely to be. Postpartum is not the time for a container that needs babying. Honestly, easy wins matter here, especially if you’ll be reheating in a hurry or handing meals to a partner, nanny, or visitor.
Plastic, when you want light and forgiving
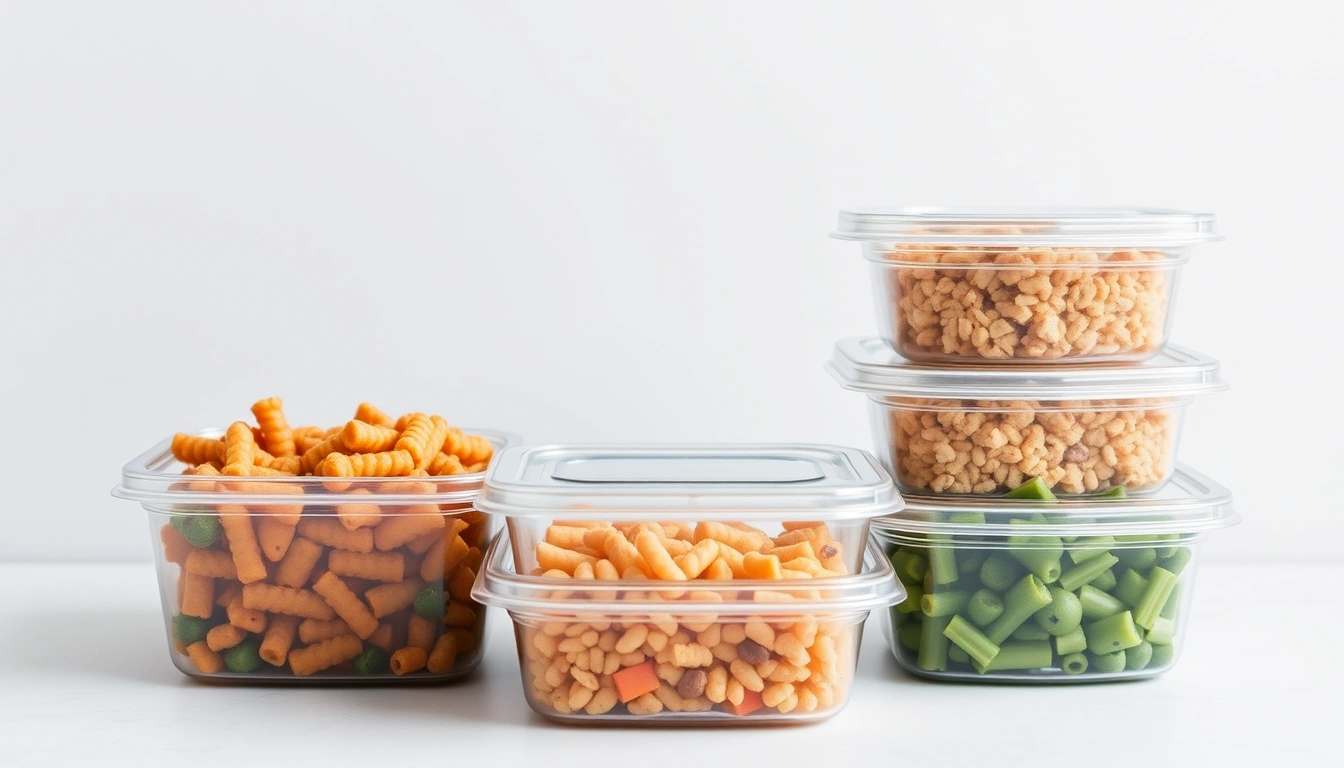
Lightweight. Cheap. Easy to stack. Food-grade plastic is usually the most practical choice if that’s what you need. I would look for freezer-safe polypropylene containers with tight lids. The upside is simple: they’re light and less likely to shatter. The downside? They can stain, hold smells, and eventually turn cloudy or misshapen.
Glass, when you care most about reheating and taste
Want to freeze a dish and later bake or microwave it in the same container? Glass can be a good fit. I’d use it for sauces, cooked vegetables, or one-dish meals that go from freezer to fridge to oven. The trade-off is weight and break risk. Glass also needs more care around thermal shock, so don’t move it from a deep freeze straight into a hot oven unless the manufacturer specifically says it’s safe.
Silicone, when flexibility matters
Need containers that pop food out easily or handle odd portions? Silicone can be handy. It’s especially useful for purees, oatmeal cups, or individual servings. But the soft walls can make stacking messier, and some silicone lids don’t seal as firmly as rigid ones. A little slippery. Not ideal for everything.
Foil pans, when convenience beats reuse
If your goal is to send meals to someone else, or freeze a casserole you expect to bake once and forget, foil pans are often the simplest answer. They’re not elegant, but they do the job. The downside is obvious: they dent, aren’t great for long-term organization, and create more waste.
I would not choose a material before deciding whether the meal needs freezer-only storage, microwave reheating, or oven reheating. That order matters.
Quick check: Hate washing dishes postpartum? Light plastic or foil usually beats glass. Want one dish from freezer to oven? Glass or foil is more useful.
How to Match Container Shape to Real Freezer Space
A freezer is a jigsaw puzzle. Shape matters more than brand. A container can be freezer-safe and still be useless if it leaves dead air or blocks the drawer from closing. I’d choose shapes based on what your freezer can actually hold, not what looks neat on a shelf.
Rectangular and square containers are often the best bet because they usually stack well and waste less space. Round ones make sense for soups, but they leave gaps. Tall containers work for liquid meals, but they’re awkward in shallow freezers. Flat containers are great for casseroles and portioned dinners, but they’re less useful for brothy foods.
Starting from scratch? Use this order:
- Measure the interior height and shelf width of your freezer.
- Decide how much vertical space you can spare for stacked meals.
- Pick one flat container size for casseroles and one smaller container size for single servings.
- Add one leak-resistant round or straight-sided container size for soups and sauces.
- Label a freezer zone so the same shapes stack together.
- Test one full stack before buying a bigger set.
Chest freezer? Taller round containers may work better because you can nest them by type. Fridge freezer? Shallow rectangular containers usually win because drawer clearance is tight.
A generic article often says “choose stackable containers” and stops there. Thin advice. The real issue is this: stackable only helps if the stack fits your freezer door, shelves, and hand size while holding the kind of food you actually cook.
Quick check: Standard fridge freezer? Prioritize shallow rectangles. Chest freezer? Taller containers are easier to live with.
What I’d Look For on the Label Before Buying

Product listings can be slippery. Ignore vague marketing and look for features that solve postpartum problems.
Look for these features
- Freezer-safe
- Leak-resistant or airtight seal
- Microwave-safe lid or vented lid
- Dishwasher-safe, if washing by hand is a burden
- Stackable design
- Transparent walls or lids, so you can identify meals quickly
- Write-on space for date and contents
If a container can’t clearly say freezer-safe, I would skip it for postpartum use. Same for a lid that feels flimsy or likes to pop off. A container that loses its seal in the freezer turns dinner into freezer burn and frustration.
I also care about lid design. Snap lids are common, but they can be hard to close when you’re distracted. Screw-top lids can seal well, but they’re slower. Silicone stretch lids are flexible, but they’re not my first choice for liquids because they can shift. For postpartum meals, I’d usually choose rigid, latching lids or simple press-fit lids that are clearly made for freezer storage.
Another thing people forget: labelability. If you cannot mark the container, or if the surface smears in condensation, you’ll end up with mystery food. I’d use painter’s tape and a permanent marker if the container itself isn’t easy to label.
Food safety guidance from organizations like the USDA and the FDA is worth checking when you’re freezing and reheating prepared food. For general food handling and storage, the USDA FoodKeeper resources and the FDA’s food safety guidance are reliable places to start.
Quick check: Listing doesn’t clearly say freezer-safe and seal-tight? Assume it’s not the one.
Choosing Containers by Meal Type, Not by Shopping Mood
Postpartum meals should pick the container, not the other way around. That’s where a lot of generic advice goes wrong. A soup container and a casserole container are not interchangeable just because they both hold food.
For soups, chili, curry, and broth-based meals
Liquids need straight-sided containers with enough headspace for expansion. A rigid container with a good seal is more useful than a pretty one. I’d avoid overfilling, because liquids expand as they freeze.
For casseroles, enchiladas, baked pasta, and lasagna
Meant to be baked later? Choose an oven-safe dish or a disposable foil pan. This is one place where the easiest container is often the right one. You want freezer to oven with as little thought as possible.
For breakfast items
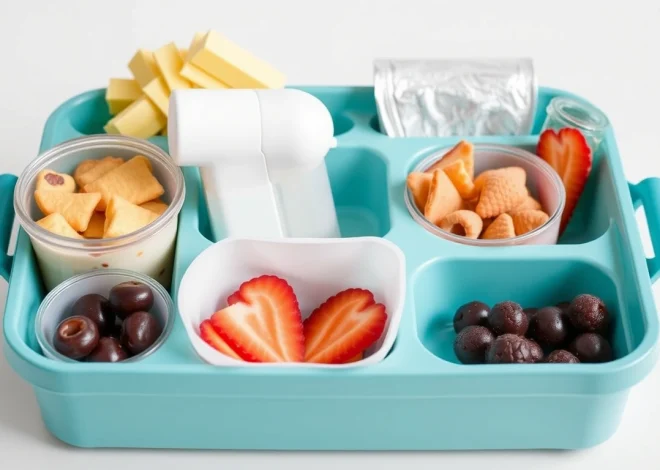
Egg muffins, baked oatmeal, or breakfast sandwiches do best in shallow containers or silicone molds for portions. Deep tubs waste space and make it harder to grab one serving before a feeding session.
For snacks and sides
Freezing fruit, muffins, or cooked grains? Small containers or zip-top freezer bags laid flat can be more practical than rigid tubs. Bags aren’t ideal for everything, but they save a lot of space for items you’ll only reheat briefly.
For breast milk or pumping supplies
If your goal is milk storage rather than meals, don’t force food containers into that job. Use containers designed for breast milk storage instead.
The honest limitation is simple: a single “best” postpartum container does not exist. A smart stash usually mixes two or three container types.
- List the meals you actually plan to freeze.
- Sort them by liquid, baked, or single-serve.
- Choose the smallest container that fits each category without crushing the food.
- Buy one extra size for odd leftovers.
- Freeze one test meal before committing to a full set.
Quick check: Mostly casseroles? Start with foil pans or oven-safe dishes. Mostly soups and sauces? Start with leak-resistant straight-sided tubs.
The Trade-Offs People Don’t Mention Enough
Every option has a cost. The right choice is usually the one that fails least in your real routine.
Plastic is light and easy, but it stains and can absorb smells. Glass reheats beautifully, but it’s heavier and less forgiving. Silicone is flexible and space-saving in odd cases, but it can be flimsy for stacking. Foil pans are convenient, but they’re disposable and not ideal for long-term organization.
There’s also the trade-off between size and speed. Large containers reduce the number of items in your freezer, but they take longer to thaw and can tempt you into serving more food than you need. Small containers thaw fast, but they create more pieces to track and more lids to lose.
I would also think about the person who will use the food when you’re exhausted. If your partner is warming meals, choose containers with obvious lids and simple labels. If relatives are dropping off dishes, choose containers you won’t mind losing. If you’re the only one handling the stash, you can be more selective about aesthetics.
One more honest point: fancy containers do not fix bad meal planning. If the food is poorly portioned or you freeze it in a shape that doesn’t match your freezer, the “best” container still becomes clutter. That math stops working fast.
Quick check: Care more about convenience than reusability? Foil and plastic win. Care more about clean reheating and low waste? Glass deserves a spot in the mix.
Edge Cases: When the Normal Advice Breaks Down
If your situation is unusual, the standard “get stackable freezer containers” advice is not enough. These are the cases where I’d change the plan.
- You have a tiny apartment freezer → What changes: height and footprint matter more than volume. → What to do instead: use shallow rectangular containers, flat zip-top freezer bags for some foods, and freeze meals in single layers before stacking.
- You’ll be giving meals away, not just storing them → What changes: container return is uncertain. → What to do instead: use disposable foil pans, labels, and tape; don’t send your good glass dishes into the wild.
- You’re mostly freezing liquids → What changes: leak risk matters more than oven safety. → What to do instead: choose straight-sided plastic or silicone-freezer containers with tight lids, and leave headspace.
- You want to reheat everything in the oven → What changes: microwave-safe plastic is less useful. → What to do instead: buy oven-safe glass or use foil pans, and confirm the container’s temperature limits before freezing.
- You’re very sensitive to smells or stains → What changes: plastic becomes less attractive. → What to do instead: use glass for sauces and strongly seasoned food, and keep separate containers for garlic-heavy meals.
- You are overwhelmed and need the simplest possible system → What changes: variety becomes the enemy. → What to do instead: buy one container size for single servings and one foil pan size for casseroles; don’t overbuild.
In edge cases like these, less variety usually helps. The goal is to cut decisions at 6 a.m., not build a container museum.
Quick check: Tiny freezer, liquid-heavy meals, or gifting food? You need a different setup than the average prepper.
A Simple Buying Plan I’d Use
Want the shortest path to a useful setup? Buy for three jobs, not twenty. I’d choose one container set for single servings, one for soups or sauces, and one for casseroles. That covers most postpartum cooking without crowding the freezer.
For postpartum freezer meal containers: what look how choose, I’d keep the first purchase small: 6 to 12 single-serve tubs, 4 to 6 medium containers, and 3 to 5 foil pans or oven-safe dishes. That gives you enough variety for the first two weeks without turning the pantry into a storage project.
Already own containers? Test them before buying more. Freeze one cup of water in each style, check the lid seal after 24 hours, and see whether the shape still stacks well in your freezer. A $0 test can save you from a $30 mistake.
If you want a simple decision rule, use this one: pick the container that matches the meal, the reheating method, and the freezer space you actually have. That rule is boring, but it works.
Quick check: Buying from scratch? Start with 3 sizes and 1 test stack, not a giant mixed set.