How to batch cook postpartum meals safely and freeze them properly
Last updated: October 22, 2026
Quick answer: How to batch cook postpartum meals safely and freeze them properly comes down to four steps—cook, cool, portion, label, and freeze—in under 2 hours whenever possible. The point is not fancy cooking; it is making food that can move from oven, stovetop, or microwave to plate with almost no decision-making, especially when sleep is fragmented and one hand is usually busy.
Key Takeaways
- Safe postpartum meal prep follows a simple order: cook, cool, portion, label, then freeze.
- Cool food to fridge-cold before freezing it, and aim to get it there within 2 hours.
- One-handed portions should open, heat, and eat easily without a full kitchen reset.
- Containers keep shape, freezer bags save space, and labels help you remember what is inside.
The safest way to batch cook postpartum meals

Batch-cooked postpartum meals are safest when you cook, cool, portion, label, and freeze in that order, with no long pause at room temperature. Start with clean containers, freezer bags, food labels, a marker, a sheet pan, and enough fridge space for at least one full layer of food.
-
Cook one mixed menu, not one giant pan of the same thing.
Use the stovetop for grains, soups, beans, and sauces; use the oven for tray bakes, meatballs, baked pasta, roasted vegetables, and casseroles. A mix of textures matters because postpartum eating gets monotonous fast, and the food is easier to use later if it can be split into meals and sides. When this works, you have separate pans or pots instead of one overloaded dish. -
Cool the food fast in shallow containers.
Spread hot food into containers that are no deeper than about 2 inches, or spread it on a sheet pan before packing. Hot food needs to stop steaming before it goes into the freezer, or you get condensation, ice crystals, and a mushier result. The right sign is steam mostly gone and the surface no longer piping hot. -
Portion for one-handed meals.
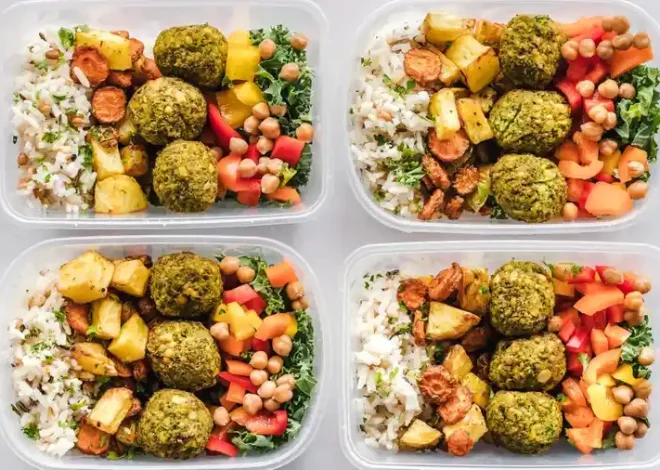
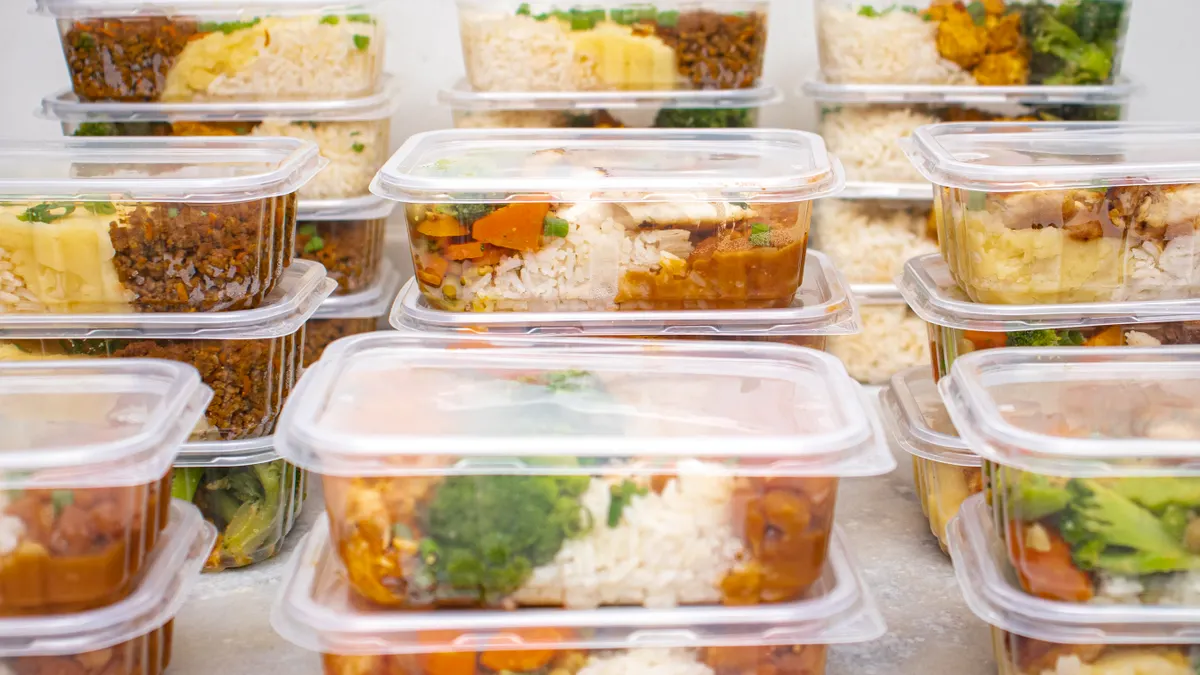
Put one meal in each container or freezer bag, and think in single portions first: one soup serving, one rice bowl, one pasta dinner, or one snack-sized tray of muffins. For a parent holding a baby, a 1-container meal beats a family-sized block every time. If a portion can be opened, warmed, and eaten with one spoon, fork, or bowl, it worked. -
Label every package before it leaves the counter.
Use food labels with the name, date made, and reheating notes such as “microwave 3–4 min, stir halfway” or “oven 375°F.” A label turns a mystery block into a usable meal. If you can read the name and date without guessing, the step worked. -
Freeze flat and stack later.
Lay freezer bags flat on a sheet pan until solid, then stand them up like files or stack them by type. Flat freezing saves space and helps food thaw faster and more evenly. When it works, the bag is thin, solid, and easy to move without leaking.
For a bigger system, the hub on postpartum meal planning and food prep systems can sit above this process, but this page stays on safe handling and freezing.
How do I cool food before freezing it?
Cool food to fridge-cold before it goes into the freezer, and get it there in under 2 hours whenever possible. That means you should not leave a pot on the counter while you answer messages, fold laundry, and forget it for half the afternoon. Use a metal pan, shallow containers, or an ice bath for sauces and soups to shorten the wait.
The main problem with slow cooling is that warm food sits in the temperature range where bacteria can multiply quickly. A deep stockpot of soup can stay warm far too long in the middle even when the top looks cooler. If you have a large batch, divide it into several smaller containers right away. A 9×13 casserole should be cut or portioned before chilling, not left as one thick slab.
For safety and quality, aim for food that has stopped steaming, feels just warm rather than hot, and can go into the refrigerator without raising the fridge temperature much. If you are packing rice, beans, pasta, or meat sauce, wide shallow containers work better than tall tubs. They cool faster and freeze more evenly.
A useful rule is simple: if the food still feels hot enough to make the container fog up heavily, it is not ready to seal and freeze. Wait, stir, and spread it thinner. That extra 10 to 20 minutes is usually better than sealing in steam and creating watery ice later.
Portioning that actually works with one hand
Portioning postpartum meals for one hand means making each package easy to open, heat, and eat without a full kitchen reset. Use 1-portion containers, zipper-style freezer bags, or divided containers only if they open and stack cleanly. A 2-cup serving of soup or a single burrito-sized wrap is more useful than a half-pan of food that needs cutting later.
The best portions for this stage are foods that move directly from package to bowl or plate. Soups, stews, chili, shredded chicken, rice, pasta, meatballs, roasted vegetables, breakfast sandwiches, and muffins all divide well. Put wet foods in rigid containers and flatter foods in freezer bags. If the food can be shaped into a rectangle about the size of a cutting board, it will fit better in a crowded freezer.
Keep in mind the trade-off: smaller portions thaw faster, but they take more labels and more containers. Bigger portions save packaging, but they force you to thaw more than you need. For postpartum use, I would rather have 8 smaller portions than 3 family-size blocks, because hunger and appetite often change day to day.
Leave a little headspace in rigid containers for expansion. For bags, press out excess air before sealing. That reduces freezer burn and makes the package stack neatly. If you are using food labels, write one meal name per package, not a menu sentence. “Turkey chili” is enough. “Turkey chili with black beans and sweet potato, Tuesday dinner when exhausted” is not.
Best containers, freezer bags, and labels for the job
A practical setup uses containers for shape, freezer bags for space, and food labels for memory. You do not need a full pantry of special gear, but you do need packaging that survives cold storage and repeated handling. A brittle takeout box or a thin sandwich bag is a poor choice because it leaks, cracks, or picks up odors.
Rigid containers are best for soups, braises, pasta bakes, and anything saucy. Choose containers that seal tightly and fit in your refrigerator and microwave. Freezer bags are best for flatter foods and ingredients that you want to thaw quickly, such as cooked rice, shredded meat, or soup portions. Pressed flat, they are easier to store than round tubs and leave more space for a diaper bag, breast pump, or snack stash.
Food labels matter more than people expect. Include the name, the date cooked, and the reheating method. A label with “oven 350°F, covered 20 minutes” is useful months later when your sleep is broken and your memory is fuzzy. You can use masking tape and a permanent marker, but purpose-made food labels tend to stay on better in cold, damp conditions.
Do not rely on memory or the color of the sauce. Most freezer contents look the same after a week, and the labels that fall off are the meals that get wasted. If you want the easiest system, label before filling the bag, not after. A flat bag with the label written on the top edge is faster to sort than a pile of mystery bricks.
For storage, keep the refrigerator and freezer organized by category: breakfast, lunch, dinner, and snacks. Even a 2-shelf freezer works better when similar items stay together. For more on safe storage, the USDA Food Safety and Inspection Service explains that freezing keeps food safe indefinitely, though quality changes over time, and the FDA also recommends labeling and dating stored food. See the USDA and FDA guidance on frozen food storage and leftovers for more details.
How to freeze postpartum meals without ruining texture
Freeze postpartum meals by getting them cold first, sealing them against air, and laying them flat until solid. Air is the enemy of texture because it dries food out and creates freezer burn on exposed spots. Once a bag or container is fully frozen, it can be stacked or turned upright.
Soups and sauces freeze well if they are cooled and packed with a little room at the top. Cooked grains, pasta, and rice can freeze well too, but they need moisture at reheating or they will turn dry and clumpy. If you are freezing a casserole, bake it fully or partially according to the recipe you used, then cool it, portion it, and wrap it tightly. Double wrapping can help reduce odor transfer for strongly flavored dishes, especially onions, garlic, and tomato-based dishes.
I would avoid freezing foods that depend on crisp texture, such as fried coatings or delicate greens, if quality matters to you. They are safe if handled properly, but they often reheat soft or soggy. That is a texture issue, not a safety issue. It is still a real downside when you need a meal that feels comforting instead of disappointing.
If you are using freezer bags, lay them on a rimmed sheet pan while they freeze so they do not slide or leak. When they are hard, remove the tray and rearrange the bags. If you are using rigid containers, do not overpack them to the lid; expansion can crack the seal or push food upward. A little headspace is safer than an overstuffed container.
How should postpartum meals be reheated?
Postpartum meals should be reheated until steaming hot throughout, with the method chosen for the food’s shape and moisture level. Use the microwave for single portions, the stovetop for soups and sauces, and the oven for casseroles, baked pasta, and tray meals. If the food was frozen in a bag, thaw it in the refrigerator first or loosen it enough to transfer safely.
Microwave reheating is often the quickest option when time is scarce. Put food in a microwave-safe dish, cover it loosely, and stir halfway through so the heat moves through the whole portion. Add a splash of water or broth to rice, grains, or pasta to keep them from drying out. The food is ready when the center is hot, not when the edges are merely warm.
The stovetop works well for soups, beans, chili, and saucy shredded meats. Heat over medium-low to medium heat, stir often, and add liquid if the pot thickens too much. The oven is better for a covered casserole or baked meal that needs to keep its shape. A 350°F oven is a common reheating temperature for many dishes, though the exact time depends on thickness.
Use caution with large frozen blocks. If the outside is hot and the middle is still icy, the food is not evenly reheated. That is why flatter portions and smaller packages are worth the effort up front. For safety, do not reheat the same meal over and over; warm only what you plan to eat.
Common batch-cooking mistakes that waste food
The most common mistakes are overfilling, under-labeling, and freezing food while it is still too warm. Those errors cost time, space, and taste, and they make the whole system feel harder than it should. The fix is not more willpower; it is a cleaner process.
A common mistake is making only one huge dish. That leaves you with many servings of one flavor and no flexibility when appetite changes. A better approach is to split the batch into at least 2 or 3 different meal types, even if they share ingredients. Another mistake is skipping food labels because “I will remember.” In a sleep-deprived household, that usually means guessing later or tossing food after you are no longer sure what it is.
Another expensive mistake is freezing food in bulky containers that do not fit side by side. A half-inch of bad packaging can cost a lot of freezer space. Flat bags, square containers, and consistent portion sizes solve this faster than rearranging the freezer every night. A third mistake is relying on texture-heavy foods that do not survive freezing well. If you know you hate soggy vegetables, do not expect them to improve in the microwave.
This is not the place for elaborate meal prep systems with 12 different containers and a full Sunday session. If the process needs a spreadsheet to survive, it is probably too complicated for the postpartum stage. Simpler wins because it gets used.
When should I skip freezing and choose another plan?
I should skip freezing when the food will not survive cold storage well, when the freezer is already packed, or when the household will eat the meal within 24 to 48 hours. Fresh refrigerator meals, shelf-stable backups, or same-day batch cooking can be better than forcing everything into the freezer. That choice saves texture and makes the kitchen easier to manage.
Do not freeze meals that are already past a safe cooling window or food that sat out too long while you were distracted. If you are unsure whether a batch cooled properly, the safer move is to discard it rather than guess. That is a hard call, but postpartum fatigue makes shortcuts easy and food safety matters more than salvaging one pot.
A simpler plan can also be smarter when you have limited freezer space. A crowded freezer that cannot close properly is not a storage system; it is a cold closet with bad airflow. In that case, focus on 2 or 3 high-value meals, a few breakfast portions, and a rotating stash of snacks. The goal is not to stock a restaurant. The goal is to make eating possible when the day is loud and your hands are full.
If there is a medical reason to follow a specific diet after birth, check the plan with a clinician or registered dietitian before stocking up on large batches. The general method here is about safe storage and reheating, not personal medical advice.
How long can postpartum meals stay in the freezer?
Frozen postpartum meals can usually stay usable for several months if they are cooled, sealed, and stored well, but quality declines over time. Soups, casseroles, grains, and cooked meats hold up better than crisp or creamy foods. Use the date on the label and rotate older packages forward so nothing gets lost. For general freezer storage guidance, see the USDA FoodKeeper app and the FDA’s leftovers advice.
How do i freeze meal prep safely?
Freeze meal prep safely by cooling it first, portioning it into shallow containers or freezer bags, sealing out air, and labeling each package with the name and date. Do not leave hot food on the counter for long stretches. Flat packages freeze faster, thaw more evenly, and are easier to handle when you are tired.
What is the best way to reheat frozen postpartum meals?
The best way to reheat frozen postpartum meals depends on the dish: microwave single portions, use the stovetop for soups and sauces, and use the oven for casseroles or baked dishes.
Drafted with AI; not yet reviewed by a person.